Introduction
In this lab, you will be simulating building your own “cyber range” inside of
Virginia Cyber Range. You will set up a forward proxy using
mitmproxy and a firewall using
nftables. In
addition, you will be using the
journalctl
utility to review logs and see what packets are being dropped.
How does Virginia Cyber Range work?
Virginia Cyber Range tries to provide a closed network for students to practice their cybersecurity skills while ensuring that they can’t (accidentally or intentionally) attack external websites. To this end, VCR does two things:
-
It blocks all traffic in or out of the network, except for students’ requests to DNS and HTTP(S) services. This ensures that student environments can’t be attacked from outside of the network (which is useful considering that these environments are often inherently vulnerable). It also prevents students from attacking hosts outside the network with VCR’s machines.
-
It logs all DNS and HTTP(S) traffic that students make to servers outside of the network. This provides an additional check to ensure that among the types of traffic that students are allowed to send outside the network, they aren’t attacking external services.
The server that you are given in this lab simulates a mini-Cyber Range, with a few hundred users that are each making various requests from the lab environment to external servers. You will need to implement a firewall and a forward proxy to block and log disallowed traffic, as well as intercept HTTP requests.
Lab structure
What to submit
You should submit a short PDF report with the following information:
Problem 1: submit your mitmproxy addon, inject_script.py, along with
proof (e.g. in the form of screenshots) that it works correctly on an HTTPS
site.
Problem 2: submit your firewall configuration, as well as your answers to the questions about the dropped packets and HTTP requests that are asked at the end of the problem.
Grading
This assignment is worth 9 points. Each of the following pieces is worth 3 points:
- The combined
mitmproxyaddon and proof that it worked - Your
nftablesconfiguration - Your answers to the questoins at the end of Problem 2.
Problem 1: Set up the forward proxy
In the first half of this assignment, we will set up mitmproxy to act as a forward proxy for traffic coming from your virtual machine.
What is mitmproxy?
mitmproxy is a flexible HTTP(S) proxy written in Python. Its primary usage is for pentesting and network audits, but it’s flexible enough to have a wide variety of uses.
For this assignment, we will be using mitmproxy as a forward proxy; a proxy that’s deployed close to the client side that (for our purposes) can be used to audit traffic going in or out of a network.
Create a user to run the proxy
Before we start using mitmproxy, we’ll want to create a dedicated user to run
the proxy. While this isn’t generally strictly necessary for us to use
mitmproxy, it’ll be convenient for us to have a dedicated proxy user in the
second half of the assignment.
We’ll name our new user mitmproxy. You should run the following command:
sudo useradd -m mitmproxy
(sudo allows you to run a command as root, which is required on Linux in order
for you to create a new user.)
Now you can start running the proxy. We will use sudo once again to execute
the mitmproxy command as the new user:
sudo -u mitmproxy mitmproxy --showhost \
  --mode upstream:http://proxy.cyberservices.internal
This will start the terminal interface to mitmproxy.
Tangent:
http://proxy.cyberservices.internalis Virginia Cyber Range’s internal Squid proxy, which they use to make sure that nobody is doing anything bad with their VMs. All HTTP traffic outside of the VCR network has to be routed through this proxy.If we weren’t running inside a network that already had its own forward proxy, we would probably run
mitmproxywith--mode transparentinstead.
Right now the UI looks a little bare. To see how mitmproxy works, open up a new
tab in your terminal (e.g. by clicking File > New Tab) and run the following
commands:
export http_proxy=http://localhost:8080
curl http://www.example.org
curl http://www.cs.virginia.edu
Now if you return to your original tab you should see some HTTP requests appear in it, such as the following:
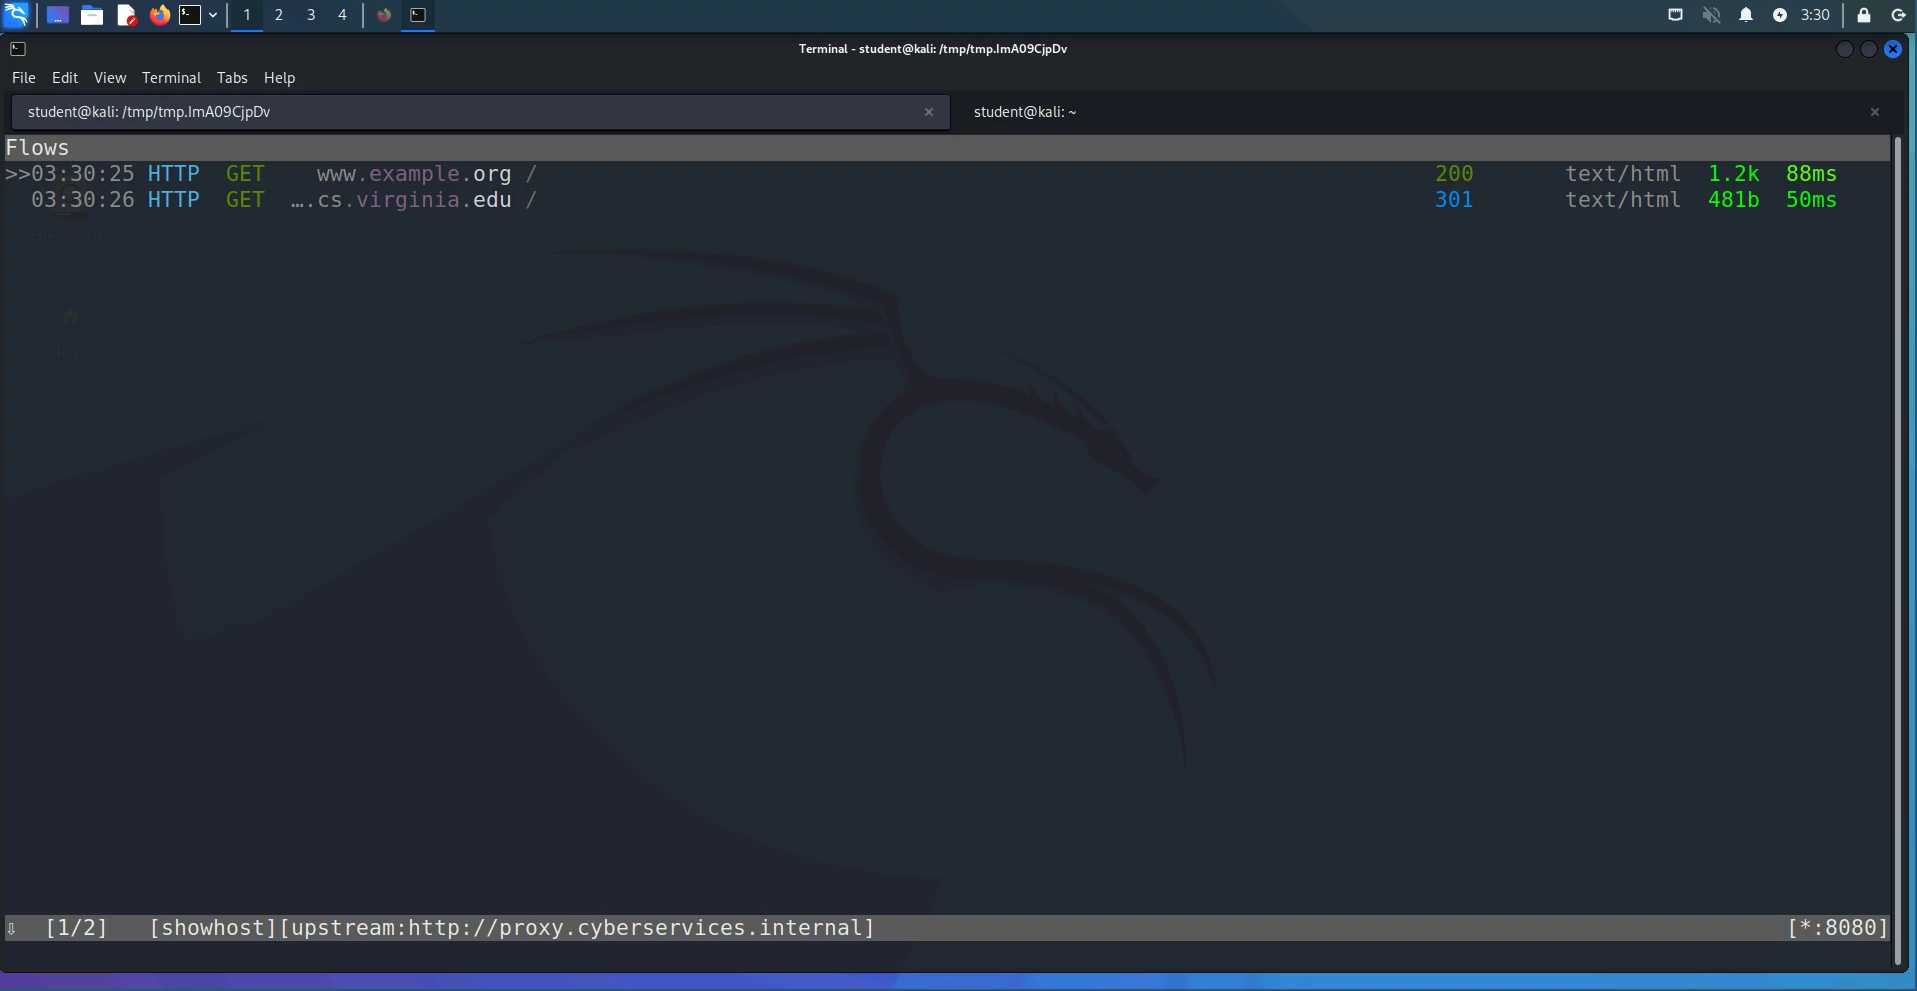
The >> on the side indicates which HTTP request intercepted by the proxy
you’re currently looking at; you can use your arrow keys to move on to a
different request. If you hit Enter, you should see a new panel show up with
details about the HTTP request you selected, e.g.:

Try making some requests to other http:// URLs that go through the proxy and
make sure you understand how the mitmproxy interface works. You can check out
the mitmproxy documentation for a
tutorial.
Installing the mitmproxy TLS certificate
Right now, we can’t proxy HTTPS requests through mitmproxy, because it’s not able to read the encrypted sessions between a random client program and an HTTPS server. To fix this issue, we’ll need to install the root TLS certificate generated by mitmproxy; this allows it to establish separate one TLS session from the client to the proxy and another TLS session from the proxy to the server.
With mitmproxy running in one tab, run the following commands:
sudo mkdir -p /usr/share/ca-certificates/extra/
sudo curl http://mitm.it/cert/pem \
  --proxy http://localhost:8080 \
  -o /usr/share/ca-certificates/extra/mitmproxy.crt
sudo dpkg-reconfigure ca-certificates
sudo update-ca-certificates
The first command creates a directory to store the new certificate. The second command downloads the certificate to that directory.
The third and fourth commands install the mitmproxy certificate system-wide, so
that unless a client program has its own root TLS certificates that it uses,
mitmproxy will be able to intercept and read its HTTPS traffic. When you run
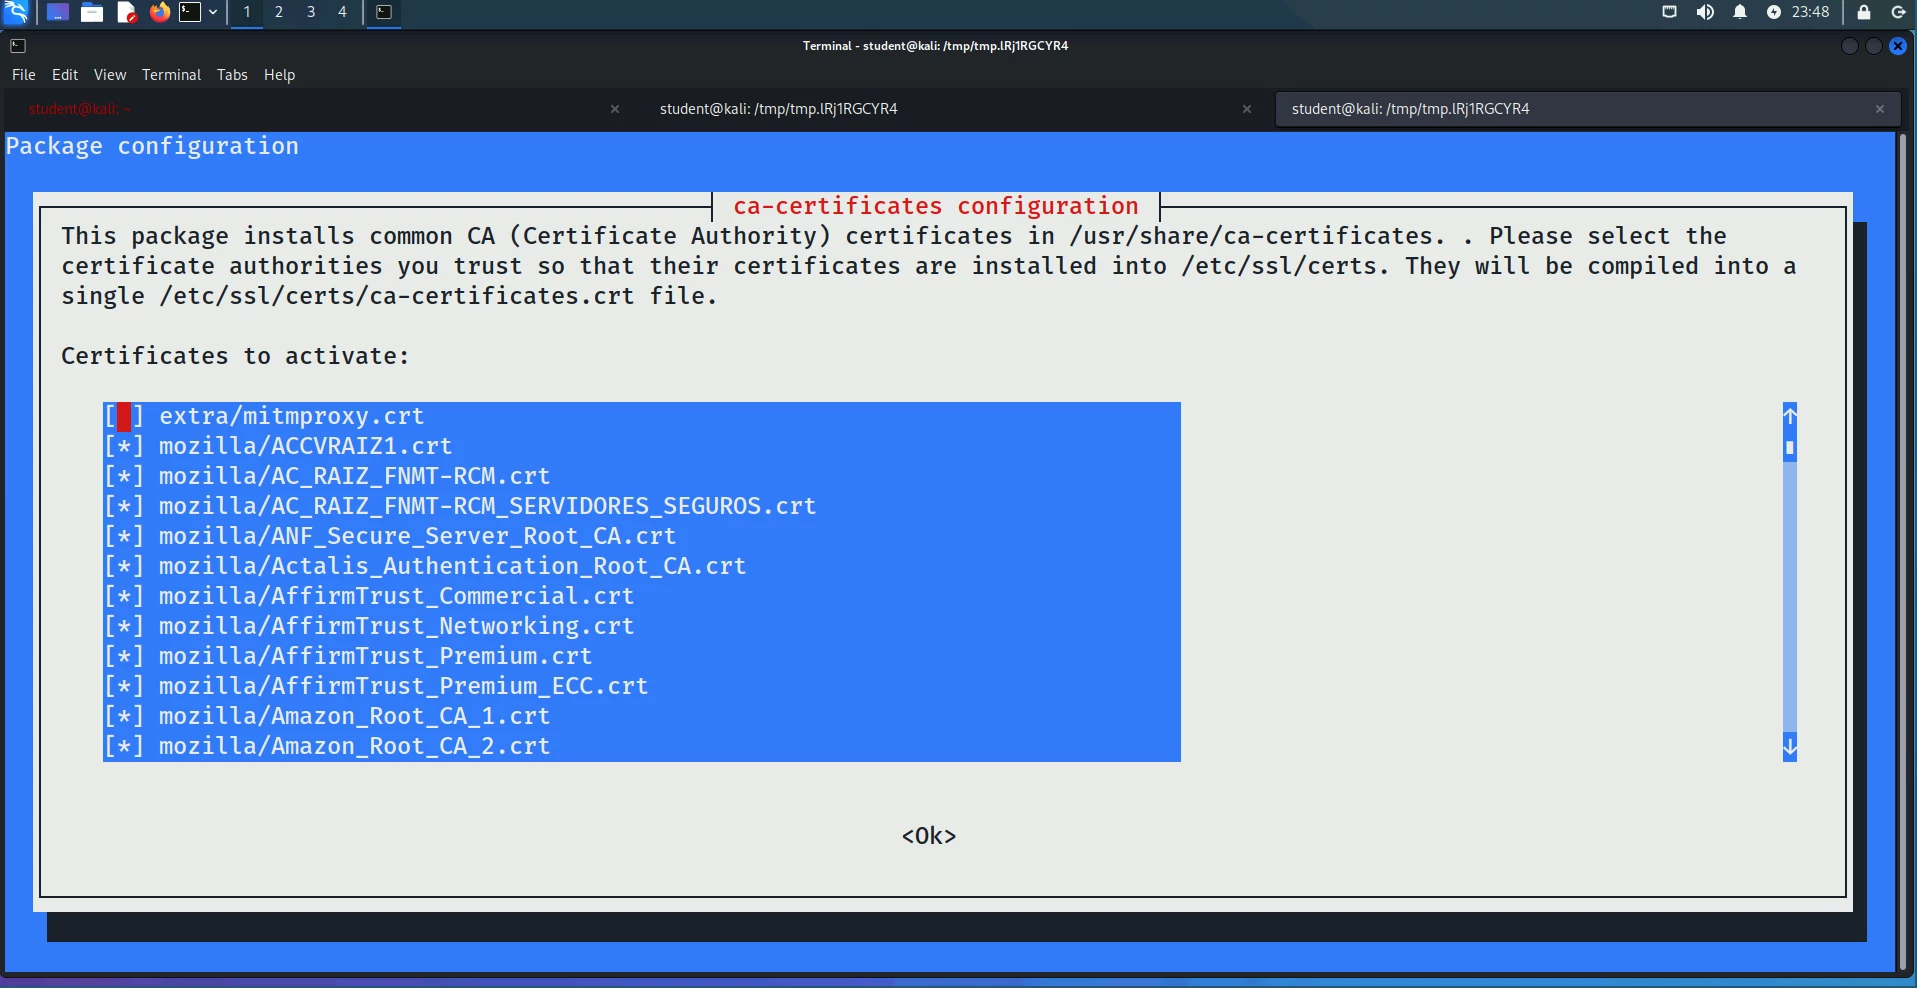
dpkg-reconfigure you should get a dialogue like the one shown below, asking
which CA certificates you want to install. You should see the mitmproxy.crt
certificate in that list. It will initially be deactivated; press Space to
activate the certificate, then press Tab and select Ok.
Once the certificates have been updated, run the following commands to test whether you installed them correctly:
export https_proxy=http://localhost:8080
wget --delete-after -l 1 -r \
  https://cs3710.kernelmethod.org/
If you did, you should see the following (or similar) in your mitmproxy session:
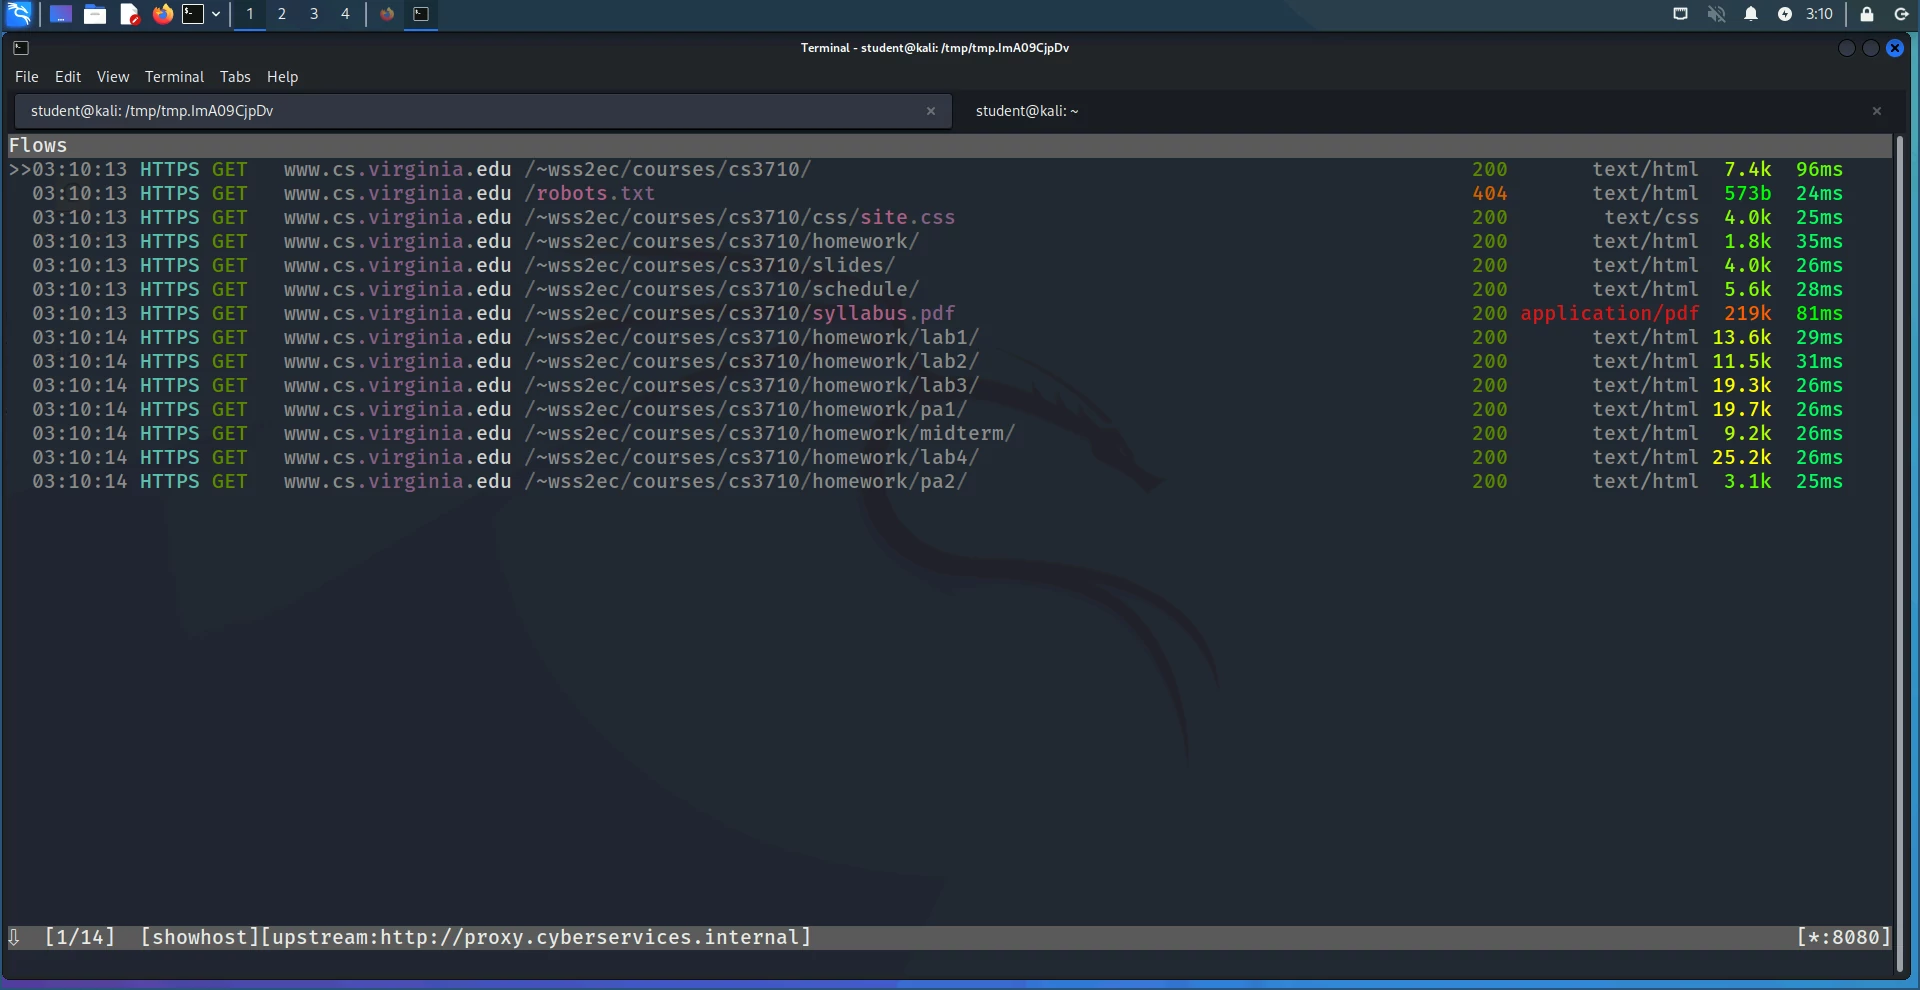
Observe that all of these requests are HTTPS, not HTTP, so we’re correctly intercepting the TLS session between the client and the server.
Stealthily injecting JavaScript with mitmproxy
mitmproxy supports Python-based addons that can be used to log and modify
requests that pass through the proxy. Create a new addon (for this example we’ll
call it inject_script.py), starting from the following template:
"""
Inject some JavaScript into the webpage returned in an HTTP response.
"""

from mitmproxy import ctx, http

def response(flow: http.HTTPFlow) -> None:
    if (response := flow.response) is None or response.content is None:
        return

    # Only inject JavaScript into pages that return status code 200
    if response.status_code != 200:
        return

    # The `response` variable holds a `Response` object, with various fields
    # that you would find in an HTTP response:
    #     https://docs.mitmproxy.org/stable/api/mitmproxy/http.html#Response
    #
    # If the request contains HTML, you should modify the response.content
    # variable so that it contains your custom JavaScript code.

    # TODO: your code here!
Modify this code so that if the response contains HTML, you inject some
JavaScript of your choosing into the page. To run mitmproxy with your addon,
run the following:
# Set permissions on inject_script.py so that the mitmproxy user
# can read the file
chmod a+r inject_script.py

sudo -u mitmproxy mitmproxy -s inject_script.py --showhost \
    --mode upstream:http://proxy.cyberservices.internal
For this problem you should submit your mitmproxy addon. In addition, you should
submit proof that your addon and mitmproxy setup works by visiting an HTTPS site
(in your browser or with curl) and demonstrating that your JavaScript was
injected into the page.
Hints
Debugging mitmproxy addons
You can import ctx in an mitmproxy addon and use it to generate log
messages. For instance, here is an extremely simply mitmproxy that simply
generates a log whenever you receive a response to an HTTP request:
from mitmproxy import ctx, http

def response(flow: http.HTTPFlow) -> None:
  if (response := flow.response) is None or response.content is None:
    return

  ctx.log.info(f"{response = }")
You can view the event log in mitmproxy by pressing E from the main window;
press q to go back. This can be helpful for debugging addons.
In addition, you don’t need to restart mitmproxy every time you make a
modification to your addon. mitmproxy will automatically reload your addon for
you as soon as you save your Python file.
Browser configuration for the proxy
If you wish to demonstrate that mitmproxy works in your browser, you will need
to go to Firefox’s preferences (either by clicking on the “hamburger” button in
the top right followed by settings, or by entering about:preferences in the
URL bar). Go to Network Settings where you should see some options to
configure proxy access.
Click Manual Proxy Configuration, and set the following options:
HTTP Proxy:localhostPort:8080- You should also click the “Also use this proxy for HTTPS” button.
Now all of your traffic should go through the proxy, which you can verify by
going to http://neverssl.com. Note that Mozilla has its own TLS certificates
that it uses, so whenever you go to an HTTPS site you’ll get a warning from the
browser. You should be able to click past those warnings and go on to the
website to see your HTTPS traffic go through mitmproxy.
Additional hints
- If you’re finding that the HTTP requests you’re making with
curlorwgetaren’t working, ensure that you’reexport‘ing thehttp_proxyandhttps_proxyenvironment variables as shown above. Alternatively,curltakes a--proxyflag, for example:
curl --proxy http://localhost:8080 http://www.example.org
-
You may wish to look at the mitmproxy addon examples for some inspiration for what you should put in your
mitmproxyaddon. -
In order to make sure that you only modify responses containing HTML, you can check the Content-Type header in the HTTP response, which you can retrieve with
response.headers.get(b"Content-Type"). -
mitmproxywill automatically reload your addon every time you make a change to it, so you don’t need to repeatedly stop and restartmitmproxywhile you’re writing your implementation ofinject_script.py.
Problem 2: Set up the firewall
For the second part of this assignment, you will be setting up a host-based
firewall for the server using nftables.
Firewalls
We want to achieve two goals:
- Block all inbound and outbound traffic from the machine except for DNS and HTTP(S) traffic, and log dropped traffic.
- Route all HTTP(S) traffic through mitmproxy so that we can log it and review any potentially malicious requests that users are making.
We can achieve both of these goals with nftables.
Configure nftables
To get you started, there’s a base nftables configuration file, which you can
either find on the server in /usr/local/share/cs3710/base.nft. You can also
download it from this link.
There are already some basic tables and chains defined in this base configuration. Note that this configuration already starts off with the following rules, which redirect HTTP(S) traffic to the proxy:
define NO_REDIRECT = { mitmproxy }

table inet nat {
    chain prerouting {
        type nat hook output priority -100; policy accept;
        skuid != $NO_REDIRECT tcp dport {80, 443} goto proxy
    }

    chain proxy {
        counter comment "Number of packets rerouted to the proxy: "
        limit rate 15/minute log prefix "PROXY_LOG: " flags all
        ip protocol tcp counter redirect to :8080
    }
}
So the main thing you need to do for this problem is implement the traffic blocking. Here are the various constraints you will want to make sure your firewall conforms to:
-
Loopback: All inbound and outbound traffic on the loopback interface (i.e. from the host back to itself) should be permitted.
-
Proxy traffic: All traffic to and from the
mitmproxyport (TCP port 8080) should be permitted. In addition, you’ll want to allow all traffic from themitmproxyuser. -
DNS: All outbound DNS queries and responses to those queries should be permitted (in the real world we’d want to audit DNS queries too, but we won’t concern ourselves with that for this lab).
-
Established connections: you should allow traffic for all “related” and “established” TCP connections. This is traffic coming from connections that the machine itself established, so that if a packet passes all of the rules in the
outputchain correctly, the machine can get a response to that packet. -
Logging: dropped packets should be logged to the system journal.
-
Default drop: all packets that do not meet any of the prior conditions for acceptance should be dropped by default.
You should look at the hints at the end of this assignment for tips on how to implement your firewall.
Review dropped packets
Once you’ve set up your firewall, you should answer the following questions:
- How many packets are being dropped per minute?
- Query the system logs with
journalctlto give an example of a dropped packet. - Why are those packets being dropped?
Review HTTP requests
With the firewall up, you should be able to see HTTP requests passing through the proxy. Answer the following questions:
- What domains are users making HTTP requests to?
- What is the least common domain that users are connecting to? What data are they sending to that domain?
Hints
- The
mitmproxyserver listens on port 8080 by default. - VCR is already cut off from the rest of the internet, so when your rules are completely finished you may not see any traffic getting dropped by your inbound rules.
General hints
mitmproxy commands
Navigation: navigation through mitmproxy is fairly straightforward. In the
main panel, you can shift between looking at different HTTP requests by pressing
the up and down arrow keys; the >> on the left will indicate which HTTP
request you currently have selected. You can press Enter to look at a specific
HTTP request, at which point you can press the left and right arrow keys for
more details. To go back (or to quit mitmproxy), press q.
Commands: Inside of mitmproxy, you can run a few different commands that you
may find helpful. You can run
mitmproxy --commands
to list the full set of available commands. To run one of these commands, press
: followed by the command inside of mitmproxy, e.g. :view.clear.
view.clear: clear the HTTP requests thatmitmproxyhas received so far.
nftables commands
This section contains various commands you may find useful for working with
nftables. All of these commands need to be run as root, so you should use
sudo ... before the command (e.g. sudo nft list ruleset).
nft list ruleset: list the currentnftablesfirewall rules.nft -f firewall.nft: read thenftablesscriptfirewall.nft, and apply all of the rules that it contains.nft flush ruleset: delete allnftablesrules.nft list counters: list all named counters in the tables, and the number of packets that have gone through them.
journalctl commands
You can view the system log with journalctl. For these commands you will also
need to use sudo:
journalctl -xe: View the system journal, starting from the end. This can be useful for viewing log messages generated bynftables.journalctl -xe -g PATTERN: search for a pattern (in this example,PATTERN) in the system logs.- You can also do
journalctl -xe | grep PATTERN
- You can also do
References
mitmproxy:
- Main website: https://mitmproxy.org/
- Documentation: https://docs.mitmproxy.org/stable/
- User interface tutorial: https://docs.mitmproxy.org/stable/mitmproxytutorial-userinterface/
nftables:
- Nftables wiki: https://wiki.nftables.org/wiki-nftables/index.php/Main_Page
- Arch Linux wiki: https://wiki.archlinux.org/title/nftables
- Gentoo wiki: https://wiki.gentoo.org/wiki/Nftables/Examples
Writing firewall rules
This section contains some tips for writing your firewall rules in Problem 2.
First steps
When you start writing your rules, the first thing you should do is set the
policies of the input and output chains to accept all packets by default.
Then you should add a rule to the bottom of each chain counting and logging the
dropped packets, e.g.
chain input {
  ...

  counter log prefix "input.drop " flags all
}
This will allow you to meet the logging requirement, but it will also show you which packets would be dropped once you finish writing all of your rules. This will help you figure out where there might still be gaps in your rules.
You can see the number of dropped packets with nft list ruleset, and you can
see the log messages emitted by nftables using journalctl, e.g.
sudo journalctl -xe -g input.drop in the example above.
Debugging firewall rules
You can insert logging statements and counters in other places to make it easier to see which of your firewall rules are being matched, and by what packets. Here’s an example:
chain output {
  ...

  ip protocol icmp counter goto output_accept
  tcp dport 80 counter goto output_accept
  skuid student counter goto output_accept

  ...
}

chain output_accept {
  counter comment "Accepted outbound packets: "
  log prefix "output.accept " flags all accept
}
In this configuration, we created a new chain, output_accept, that counts the
number of packets it sees, emits a log message (which you can query with
journalctl -xe -g output.accept), and then accepts the packet. In the original
output chain, all ICMP (ping) packets, packets going to port 80, and packets
from user student automatically go to this chain before being accepted.
If you find that there are too many log messages being generated, you can rate-limit them with something like
limit rate 10/minute log prefix "output.accept " flags all accept
Measuring dropped packets
Named
counters
(such as the input_drop_counter and output_drop_counter counters given in
the base configuration) can be listed with the following command:
$ sudo nft list counters
table inet firewall {
        counter input_drop_counter {
                comment "Number of dropped input packets: "
                packets 14 bytes 928
        }
        counter output_drop_counter {
                comment "Number of dropped output packets: "
                packets 14 bytes 720
        }
}
You may find this helpful while taking your measurements. You can reset these counters with
$ sudo nft reset counters
The number of packets matched by non-named counters can be seen when you run
nft list ruleset.
Getting locked out of VCR
Host-based firewalls have footguns lying all over the place. In the real world, it is extremely easy to write a firewall rule that blocks you from accessing the machine that you’re working on, thereby locking yourself out (a mistake that your own professor has made more times than he’d care to admit).
The input and output chains of the firewall table that you get in the base
nftables configuration each include a rule to allow all traffic to ports 22
and 3389 in Virginia Cyber Range. You should not delete these rules, and
preferably you should try to keep them close to the top of each chain. These
rules are required for VCR to give you browser access to your VM.
Should you either choose not to heed that warning, or you find a different way to cut yourself off from VM access, it’s still possible to recover the machine without a full box reset. The VM will freeze, and VCR will tell you that it’s no longer able to access the machine. To fix this problem, you can just reboot your VM from the web interface; when it comes back online, the firewall rules should all be flushed and you should be able to access your machine again.